| Oracle® Data Mining Administrator's Guide 11g Release 2 (11.2) Part Number E16807-07 |
|
|
PDF · Mobi · ePub |
| Oracle® Data Mining Administrator's Guide 11g Release 2 (11.2) Part Number E16807-07 |
|
|
PDF · Mobi · ePub |
This chapter explains how to connect to a database to use Oracle Data Mining. It contains the following sections:
SQL*Plus and SQL Developer and other client tools are installed with Oracle Database. SQL*Plus is a command line tool for transmitting SQL and PL/SQL to the database. SQL Developer is a graphical development environment for SQL and PL/SQL.
You can use the Data Mining PL/SQL API in either SQL*Plus or SQL Developer. Within SQL Developer you can use both the Data Miner graphical tool and the Data Mining PL/SQL API. For information about the PL/SQL API, see Oracle Data Mining Application Developer's Guide.
If you have installed Oracle Database locally on your PC, you can follow these steps to start SQL*Plus or SQL Developer:
From the Windows Start menu, select Oracle – OraDb11g_homen.
Note:
If there are n database installations, they will appear asOracle – OraDb11g_home1, Oracle – OraDb11g_home2, ...... Oracle – OraDb11g_homen in the Start menu.
Each of these refers to a separate ORACLE_HOME. Be sure to select the appropriate one.
Choose Application Development.
Choose the name of the application.
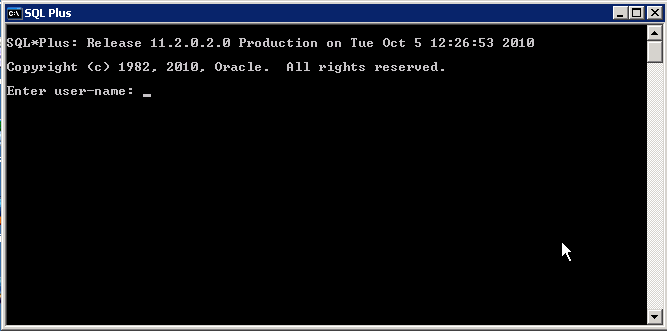
When SQL*Plus starts up it is already connected to the local database. Enter the name of a user ID that has data mining privileges, as described in Chapter 4. You will be prompted to enter the password.
The first time you run SQL Developer, you may be prompted to provide the path to the Java executable. If so, specify the full path of jdk\bin\java.exe under the Oracle home directory for the database. For the installation described in Chapter 2, the path would be:
C:\app\myuser\product\11.2.0\dbhome_1\jdk\bin\java.exe
To define a connection to the local database:
Right click Connections and choose New.
The New/Select Database Connection dialog appears.
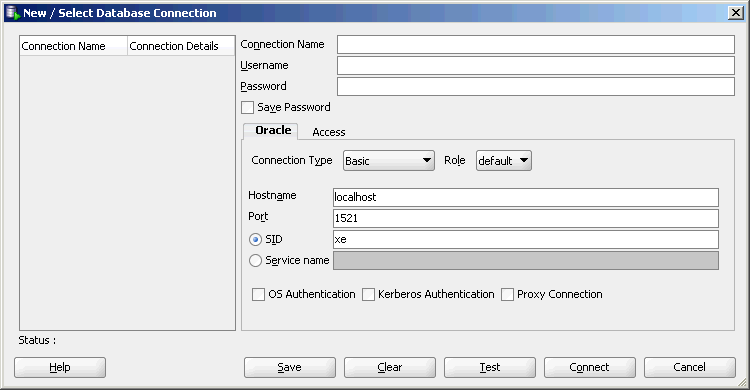
For Connection Name, specify a meaningful name that you will remember.
For Username/Password, provide a user name and password for the connection. The user must have data mining privileges as described in Chapter 4.
For Hostname, specify localhost to indicate that the database is hosted on the local computer.
For Port, specify the port where the database will listen to requests from the client. The default port is 1521.
For SID (Service Identifier), specify the simple database name. This is the first component of the global database name described in the installation instructions in Chapter 2.
Click Connect to connect to the database using the specified credentials.
Oracle Data Miner is a choice on the Tools menu of SQL Developer.

Oracle Data Miner requires an administrative (SYS) connection for installation. A separate connection to the database is required for each user that will use the tool. Instructions for creating these connections are provided in the Oracle Data Miner Help. For installation and configuration instructions, go to http://www.oracle.com/technetwork/database/options/odm/dataminerworkflow-168677.html.
To connect to an Oracle Database, a client application must identify the database and present appropriate credentials. The connection mechanism depends on the type of client and whether it is running locally or remotely. Some connections require the installation of Oracle Client software.
There are several methods for specifying login credentials. For example, a client may present login credentials at the time of the connection, as shown below. The system will prompt for a password and establish a connection.
SQL>CONNECT username @ "hostname[:port][/databasename]"
You may also identify a connection with a predefined Net Service Name.
Oracle Spreadsheet Add–In for Predictive Analytics, whether running locally or remotely, requires the installation of Oracle Client and the creation of a Net Service Name.
See Also:
"Create a Net Service Name"Note:
SQL Developer and Oracle Data Miner do not require the installation of Oracle Client.For details about Oracle Data Miner installation and configuration, see Oracle Data Miner 11g Release 2 "Getting Started" on the Oracle Technology Network:
http://www.oracle.com/technetwork/database/options/odm/dataminerworkflow-168677.html
Additional details are available in the online help for Oracle Data Miner.
You must install Oracle Client if:
You wish to use Oracle Spreadsheet Add-In for Predictive Analytics
You do not have a local database and you wish to use SQL*Plus and other tools for connecting to a remote Oracle database.
Use the following steps to install Oracle Client on a Windows platform:
Note:
The following instructions are not intended as a replacement for Oracle Client and Net Management documentation. For additional information, refer to:Ensure that your computer meets the system requirements described in Oracle Database Client Installation Guide for Microsoft Windows.
Stop any Oracle services that may be running on your computer.
In Windows Control Panel, choose Administrative Tools, then Services. Find the service names that start with "Oracle". Choose Stop for each one.
Note:
To stop an Oracle database, first stop the database service (OracleServiceservice_name), then stop the database listener (OracleOraDb11g_homeTNSListener).Log on to your computer as a member of the Administrator's group. If you are unsure if your user ID is in the Administrator's group, check User Accounts in Windows Control Panel.
To start the installation, go to the Client installation directory and run SETUP.EXE to start Oracle Universal Installer.
On the Select Installation Type page, choose Administrator.
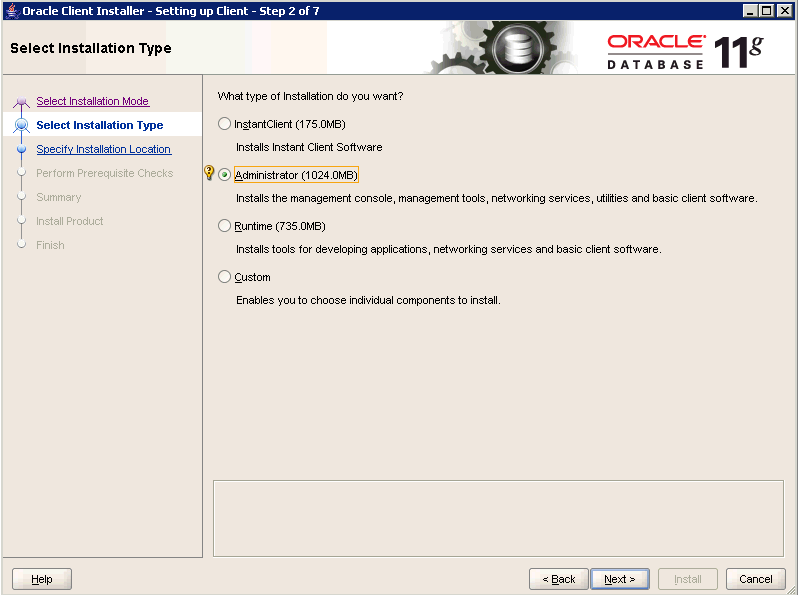
Click Next.
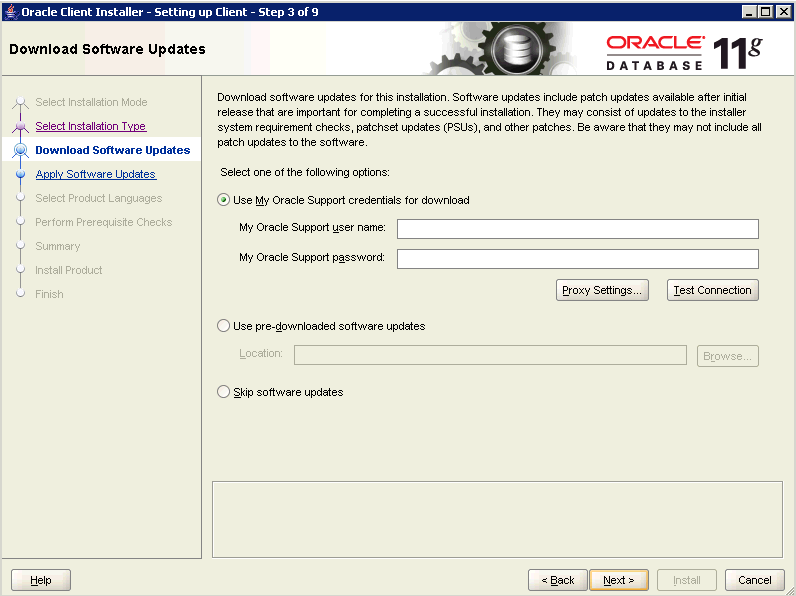
In the Download Software Updates page, provide your My Oracle Support credentials if you want to automatically download software updates. Click Next.
On the Select Product Languages page, select the language for the Oracle Client user interface.
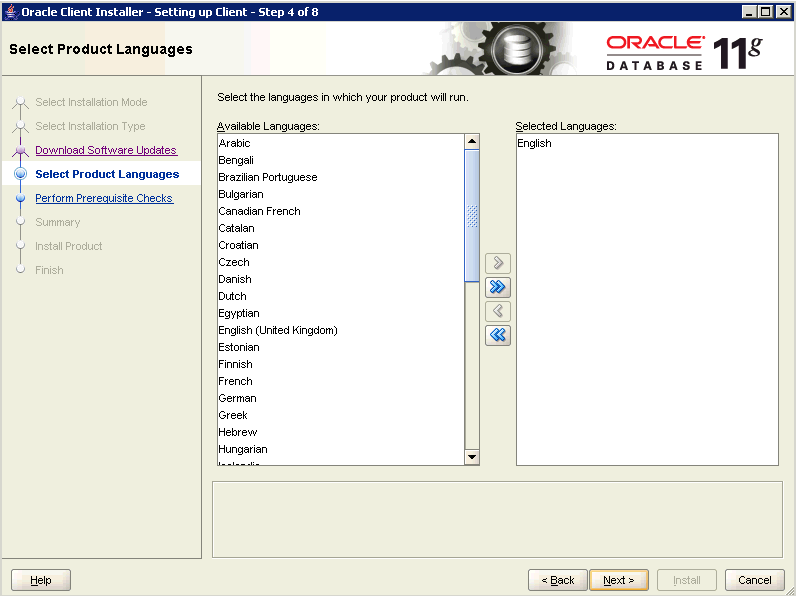
Click Next.
On the Specify Install Location page, provide the path of the Base directory in which you installed Oracle Database. (See "Install Oracle Database" step 8.)
The Installer provides a Software Location under Oracle Base. This will be the home directory of the Oracle client that you are installing (Oracle home). If this directory does not exist, the Installer will create it. If the directory does exist, make sure that it is empty.
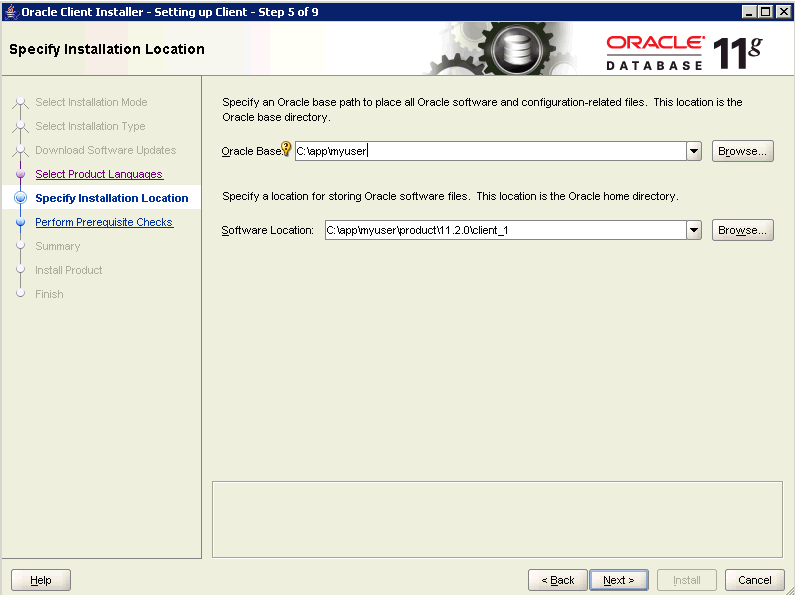
Click Next.
The Installer performs prerequisite checks, then displays the Summary page.
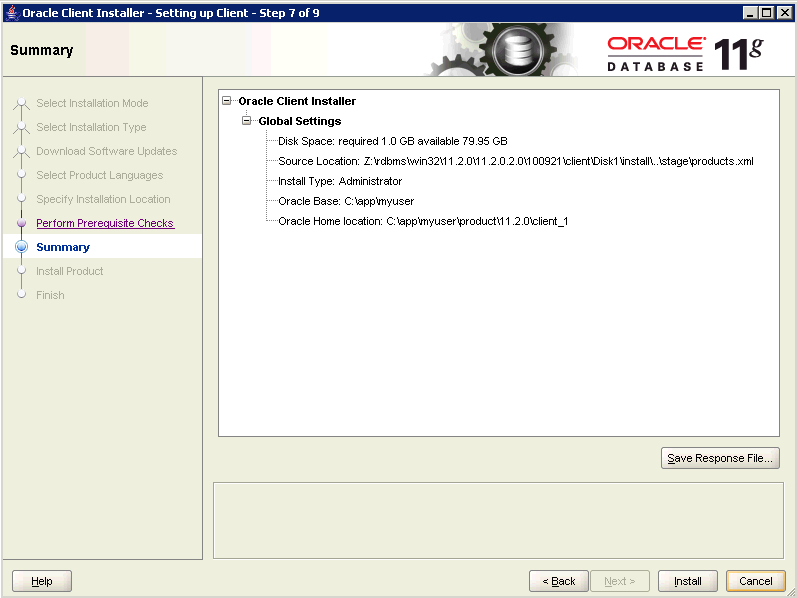
Click Install to complete the set up process and begin the installation.
On the Install Product page, the Installer displays a progress bar.
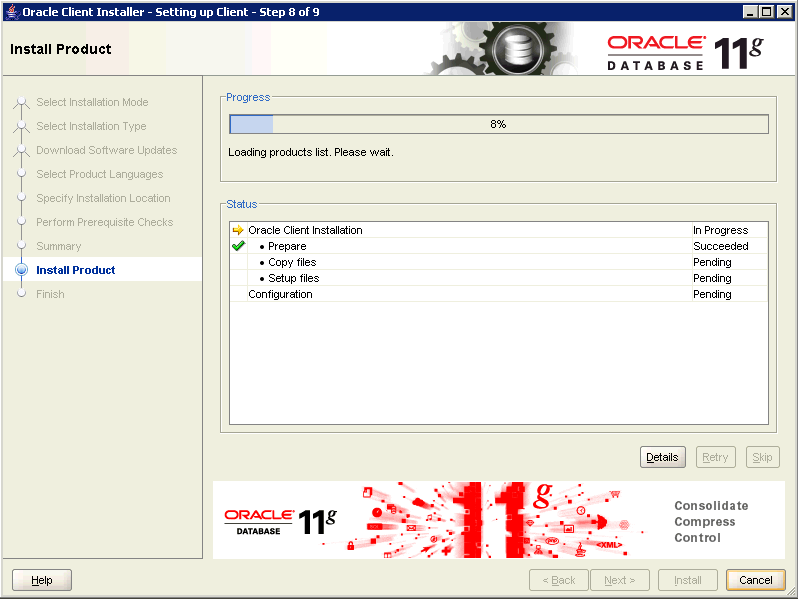
When the installation is successfully completed, click Close.
Oracle Net Configuration Assistant starts and displays the Welcome page.
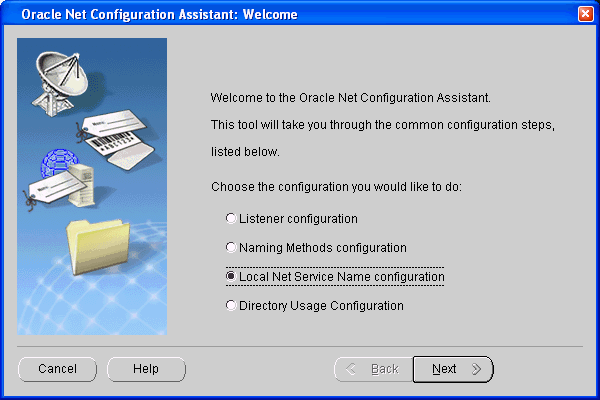
Choose Local Net Service Name Configuration, then click Next.
Oracle Net Configuration Assistant determines that Oracle Client can use the Easy Connect naming method, as described in "Oracle Client and Oracle Net". A Net Service Name is not needed. Simply click Next.
Oracle Net Configuration Assistant displays summary information about the connection configuration.
Click the Password Management button at the bottom of the page to unlock any schemas that you plan. If you wish, you can also reset the system passwords. If you will use the Oracle Data Mining sample programs and you did not unlock the SH schema when you installed the database, you should do so now. (See "Install Oracle Database".)
Click Exit to exit Oracle Net Configuration Assistant, then click Finish to complete the installation of Oracle Client.
On the End of Installation page, click Exit to exit Oracle Universal Installer.
If you stopped any Oracle services before running Oracle Universal Installer, you can restart them at this time.
In Windows Control Panel, choose Administrative Tools, then Services. Find the service names that start with "Oracle". Choose Start for each one.
Note:
To restart an Oracle database, first restart the listener (OracleOraDb11g_homeTNSListener), then restart the database service (OracleServiceservice_name).The instructions in this section explain how to create a Net Service Name. Follow these instructions if you wish to use Oracle Spreadsheet Add–In for Predictive Analytics.
Note:
The following instructions are not intended as a replacement for Oracle Client and Net Management documentation. For additional information, refer to:To create a Net Service Name:
From the Windows Start menu, select Oracle – OraClient11g_homen.
Note:
If there are n installations of Oracle Client, they will appear asOracle – OraClient11g_home1, Oracle – OraClient11g_home2, .... Oracle – OraClient11g_homen in the Start menu. Be sure to select the appropriate one.Choose Configuration and Migration Tools.
Choose Net Configuration Assistant.
Oracle Net Configuration Assistant displays the Welcome page.

Choose Local Net Service Name configuration, then Next.
On the next page, choose Add to add a new Net Service Name. Then click Next.
Provide the Global Database Name in the Service Name text box. (See "Install Oracle Database".)
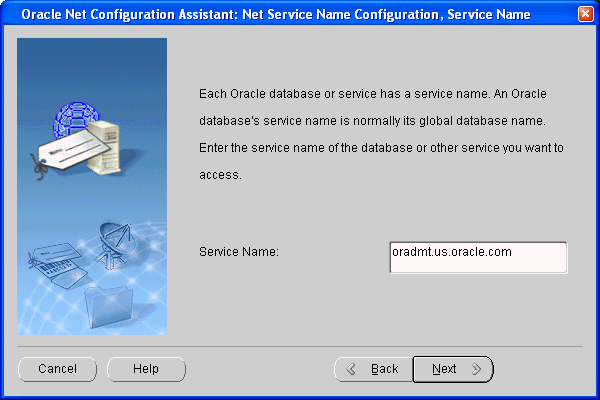
Choose Next.
On the next page specify the communication protocol. The default is TCP.
Choose Next.
On the next page, choose Yes, perform a test to test the new connection.
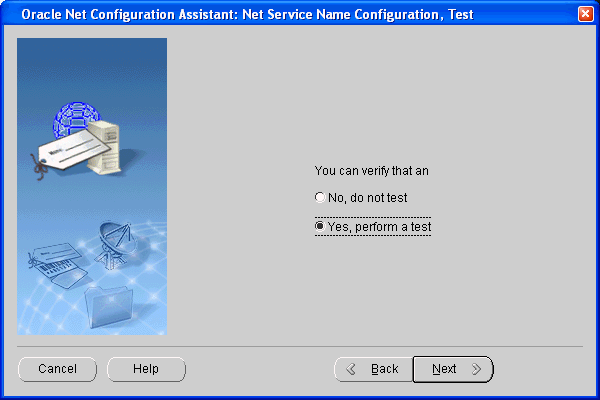
The connection will probably fail until you provide a new user ID and password.
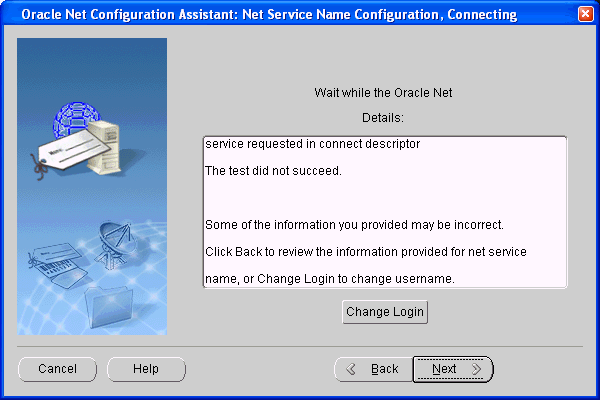
Choose Change Login.
Provide the user ID and password of an account that has data mining privileges on the host.
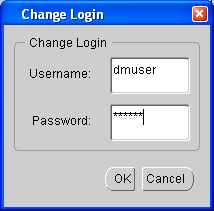
If the user name and password were the only problem with the connection, Oracle Net Configuration Assistant makes a successful test connection.
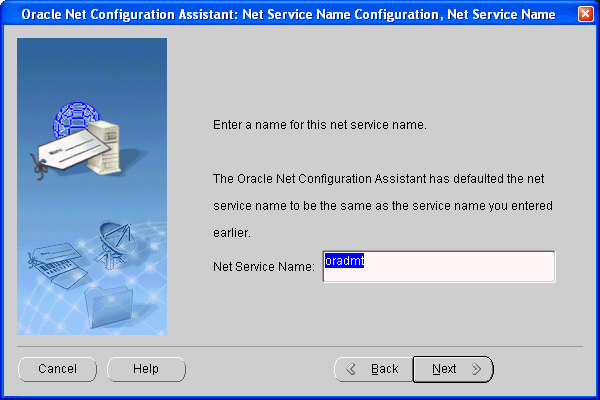
Choose Next.
Oracle Net Configuration Assistant reports that the connection configuration was successful. When you click Next, you are returned to the Welcome page, where you have the opportunity to perform additional configuration.
Click Finish to exit Oracle Net Configuration Assistant.
Oracle Spreadsheet Add–In for Predictive Analytics implements predictive analytics ("one–click" data mining) within Microsoft Excel. You can use the Spreadsheet Add–In to analyze data stored in Excel or in Oracle and to import/export data mining models to/from Oracle Database. Whether the data is stored in Excel or in the database, the Spreadsheet Add–In requires a database connection.
The Spreadsheet Add–In requires Oracle Client. It uses a Net Service Name to connect to the database. Even if the database is local, Oracle Client and a Net Service Name are required.
To connect to Oracle, follow these steps:
Install Oracle Client on your computer as described in "Install Oracle Client".
Create a Net Service Name as described in "Create a Net Service Name".
Add the Add–In to Excel as described in "Optionally Install the Spreadsheet Add–In".
From the Add–In menu, choose Connect.
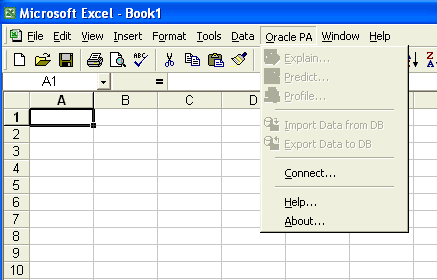
The Connect (Oracle Database) dialog appears.
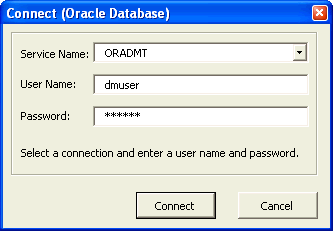
From the list of predefined Net Service Names, choose the connection you want to use. Provide a user name and password and click Connect to activate the Spreadsheet Add–In.